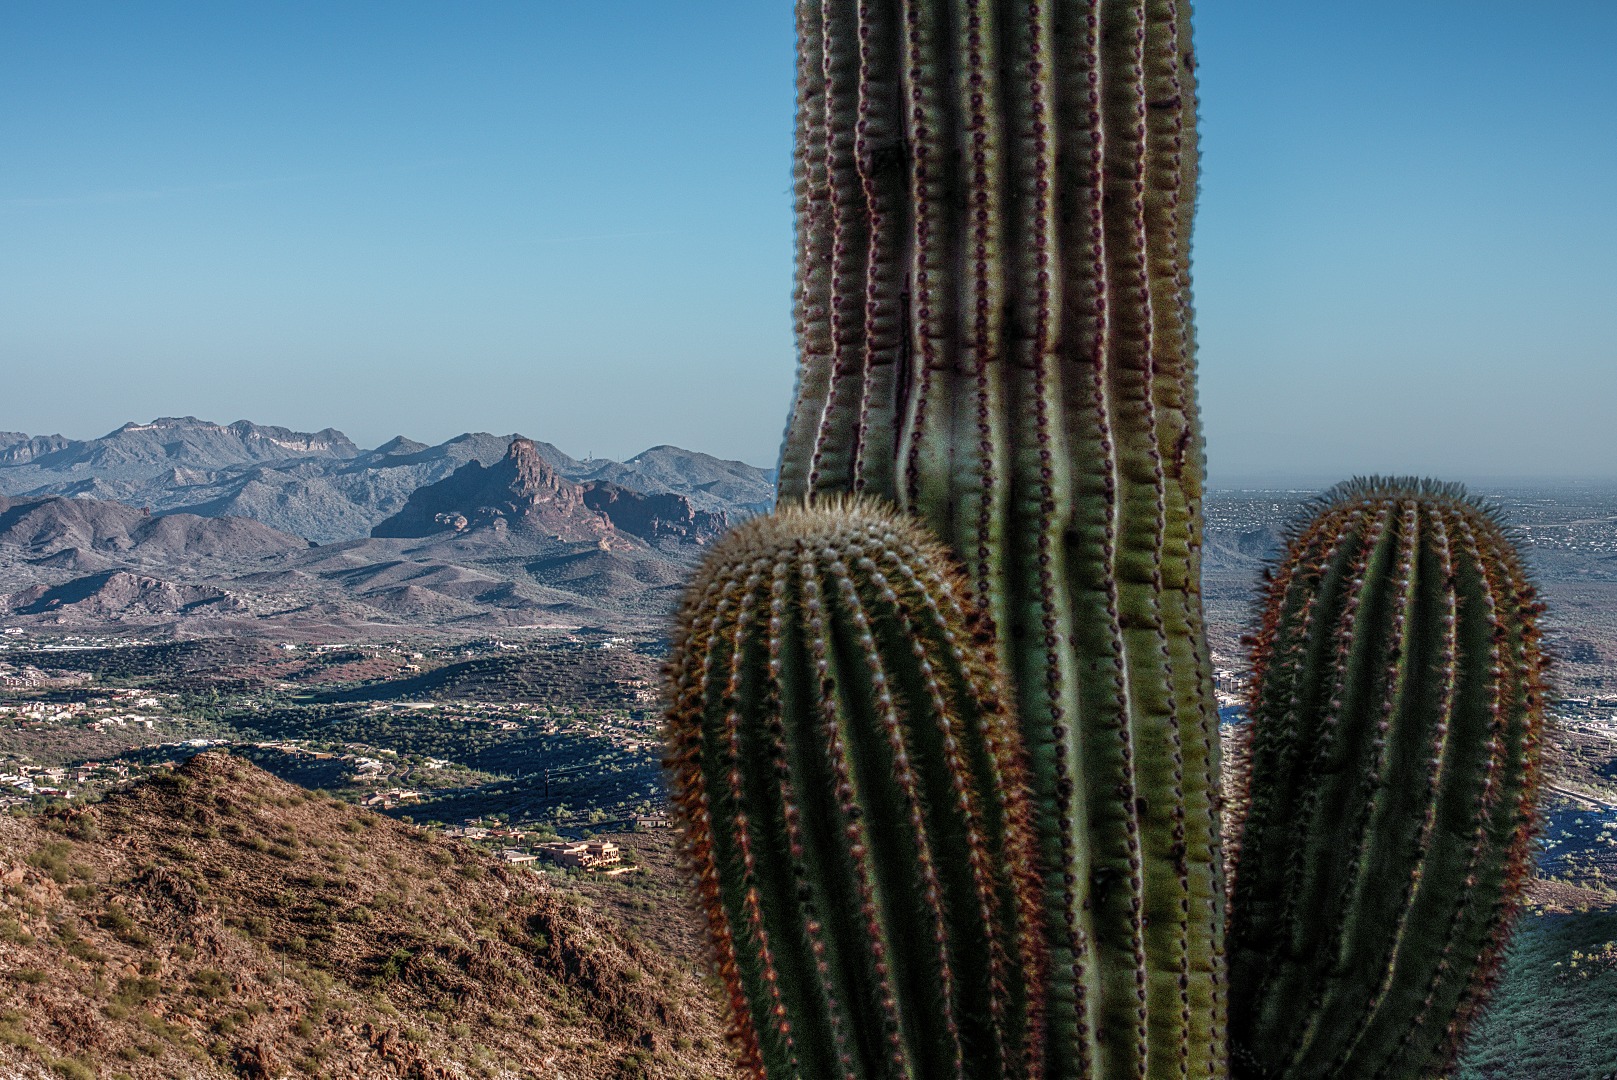
I got this photo yesterday while hiking the Sunrise Trail with Nick and Marilyn.
Nick had asked me, yesterday, about the “enhancements” used to create some of my photos. The answer was highly technical, so I just said “a lot”. For the above photo, I did the following.
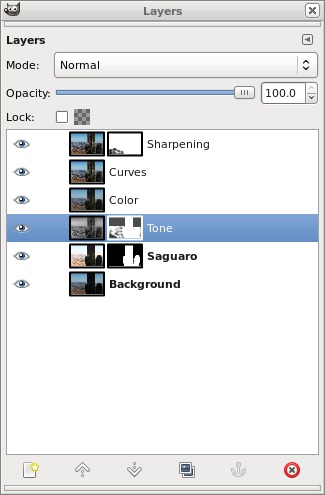
- I processed the RAW file with the photo twice and brought each image into GIMP as a separate layer. I used an appropriate exposure compensation value for the background with the white balance set to “Daylight”. I processed the image a second time for the saguaro with the white balance set to either “Cloudy” or “Shade”. I probably used “Cloudy” because “Shade” usually makes things too red for my liking. For some photos, I may process the RAW file additional times with different exposure values or I may use one of the (exposure) bracketed files showing (roughly) the same shot. (Additional work – alignment – is required when I process a different exposure.)
- I placed the saguaro layer on top and carefully created a layer mask so that just the saguaro would be visible from that layer. The underlying layer had a very dark, almost black, saguaro due to being underexposed.
- When this is done, there is frequently some light fringing around the border of the mask. I touch this up by painting into the layer mask with a partially opaque brush. I’ll vary the brush size and degree of transparency depending upon the area under consideration.
- At this point, I hopefully have an image which could stand on its own without any additional work. However, I’ve found that detail is increased if I add a tone layer created using the Mantiuk ’06 tone mapping operator. So, I run the tone mapping operator on the RAW file and bring that result into GIMP as yet another layer. This layer is placed on top.
- I disable the tone layer momentarily and create a “color” layer from the bottom-most two layers. These were the layers that I had originally processed from the RAW file. I set the layer mode on the “color” layer to Color.
- The resulting image often looks too harsh. In particular, there are frequently some white areas, often in sand or foliage, that appear too bright. I create a layer mask for the tone layer and partially mask these areas exposing the results of the original two layers. I will also often mask out the sky as it often appears quite blotchy. If the sky has interesting clouds, tone mapping will sometimes help to explicate those clouds; in those situations, I’ll often leave some or all of it in place. But even then, tone mapping can cause excessive sharpening. Experimentation is required to find just the right level of masking.
- I create another new layer using “New from Visible”. This layer will combine everything that can be seen in the image so far. I use the “Curves” tool on this layer and make minor tonal adjustments. I try to keep these minor though because some color changes will often occur at the same time.
- The top layer (upon which I had made tonal adjustments) is duplicated again. I sharpen this layer using “Unsharp Mask”. Portions of the image will often appear too sharp. I create a layer mask and mask those portions out, exposing or partially exposing the unsharpened layer underneath.
- The image is written out three times, once in GIMP’s native (XCF) format, once as a JPEG file at full resolution, and a third time as a JPEG file that’s 1080 pixels high. I’ll use this latter file in my blog posts. All layers that I used in creating the image are preserved in the XCF file. This allows me to go back and tweak parts of the image if I should decide that I don’t like it for some reason. (This happens with some frequency.)
This is what the layer dialog looked like when I was done with this photo. For some photos, I will end up with ten layers or more.

