On Tuesday during our week’s stay in Moab this year, Marie and I walked down Park Avenue in Arches National Park. Water runs through that area and has eroded some of the sandstone away exposing interesting swirls and other patterns in the rock. Marie noticed that when she took a photo, it just didn’t do justice to what her eyes were seeing. She told me this and I told her to continue to take photos anyway because it was likely that we could do some editing to make the photos more interesting.
Here, below, is the cropped and scaled photo as it came from Marie’s camera. Aside from those two operations – cropping and scaling – no other editing has been performed on the photo.

Below is a photo that I enhanced somewhat by using GIMP’s Levels tool and Curves tool, both found under the Colors menu. The Levels tool can be used to set the white balance. Used correctly, it’ll widen out the histogram for the image. For this photo, I used the black and white eyedroppers, selecting a very dark point on the back of the heel of one of the shoes as the black point and the brightest spot on one of the white socks as the white point. Black ended up too black, so I adjusted that level by hand until it looked right.
I use the Curves tool a lot when working on images. It very selectively changes contrast for certain portions of the image, yet is easy to use. You basically drag points around on the curve overlaying the histogram that’s presented until you find something that works well for your image. One of the things that I found over the years is that it’s often better to use different Curves settings for different parts of the image. E.g. I find it generally works out better to work on the sky separately from the rest of the image. So, I’ll use one of several different techniques to select the sky, and then use the Curves tool on that selection. Then, I’ll invert the selection and use the Curves tool on the remainder. If that leaves something to be desired too, I’ll select other regions of the image and use Curves on each of them separately. It takes a lot of trial and error and the willingness to throw perhaps away an hour’s worth of work.
This version of the photo is not completely unrealistic. This might be close to how some of us perceive the sandstone when observed with our own eyes.

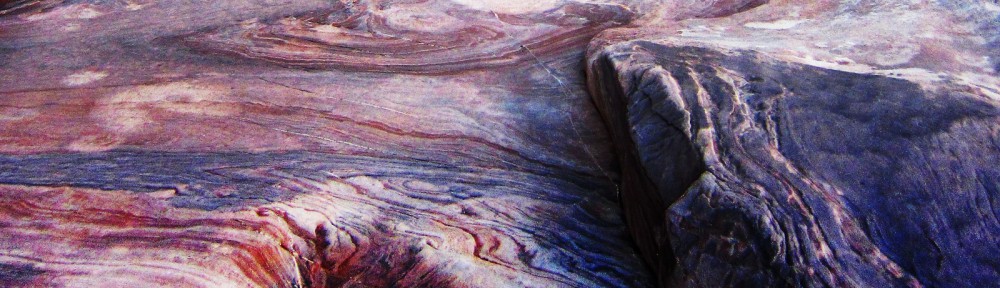
If you get really carried away, you can make the sandstone look like marble as shown in this version:
